Today I'm going over how I made Padme's Picnic Dress.
This costume took a lot of time to make, largely due to the extensive embroidery. And by a lot, I mean I was working on this costume, off and on, for about a year and a half. But I'm really happy with how it turned out and I'm super excited to share how I made it with you all.
 |
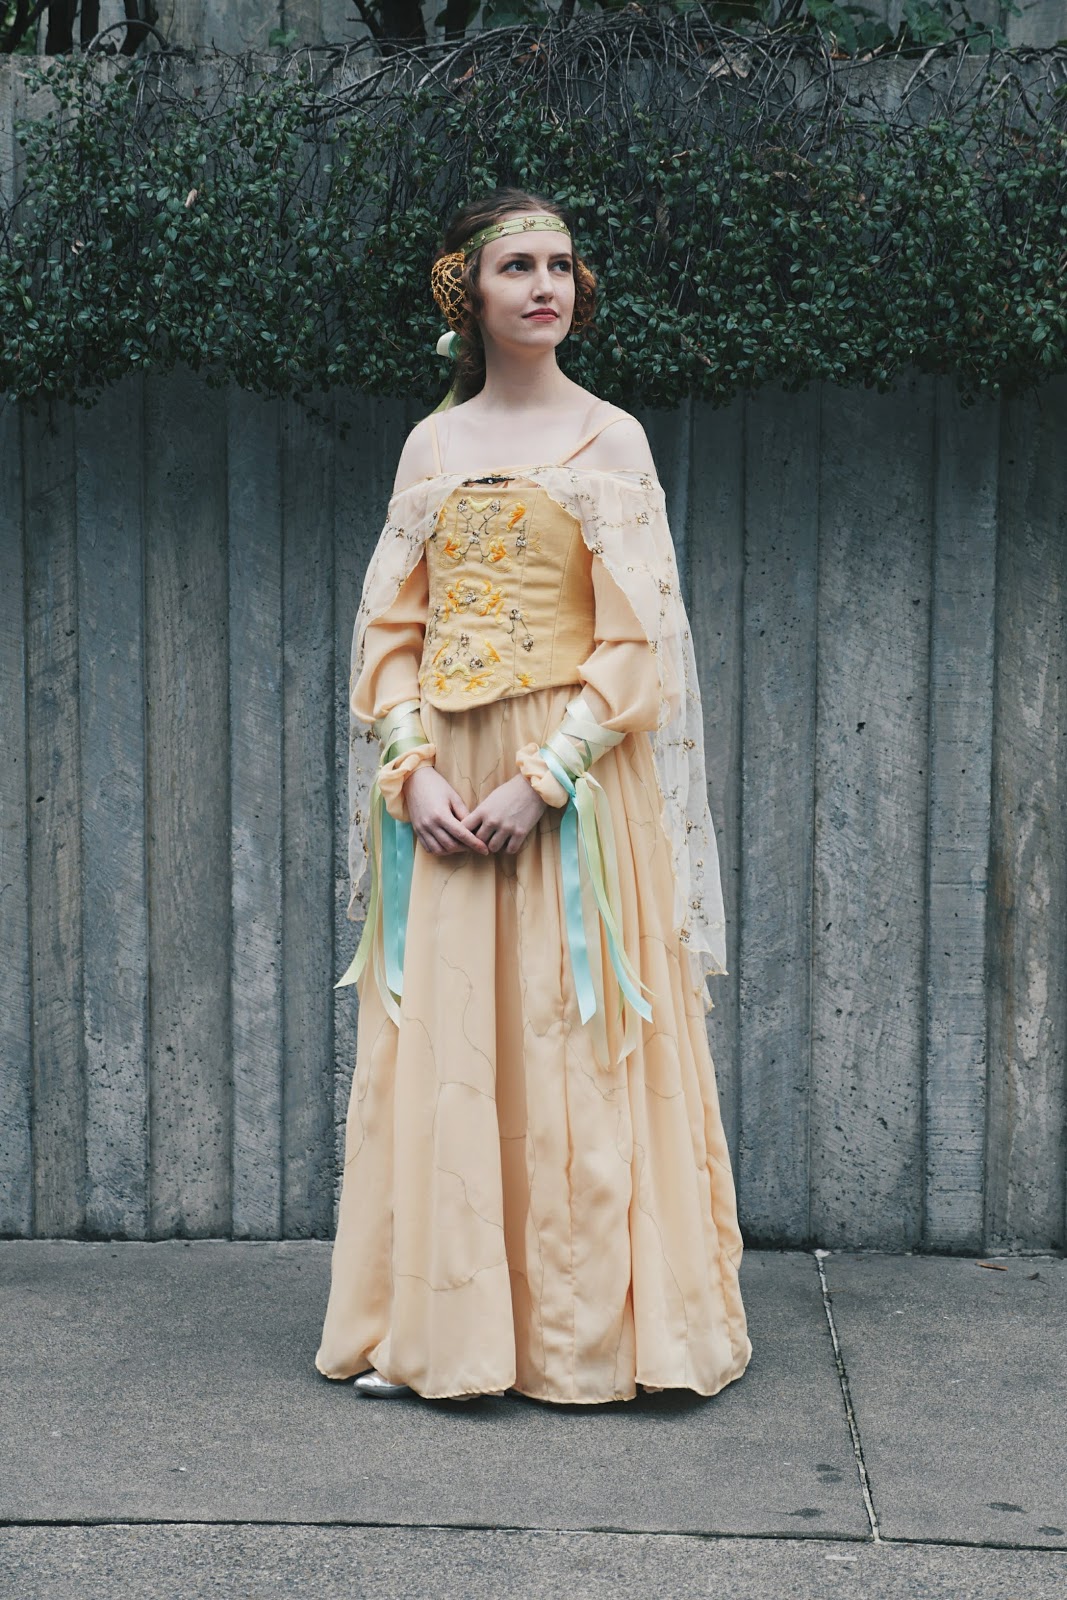
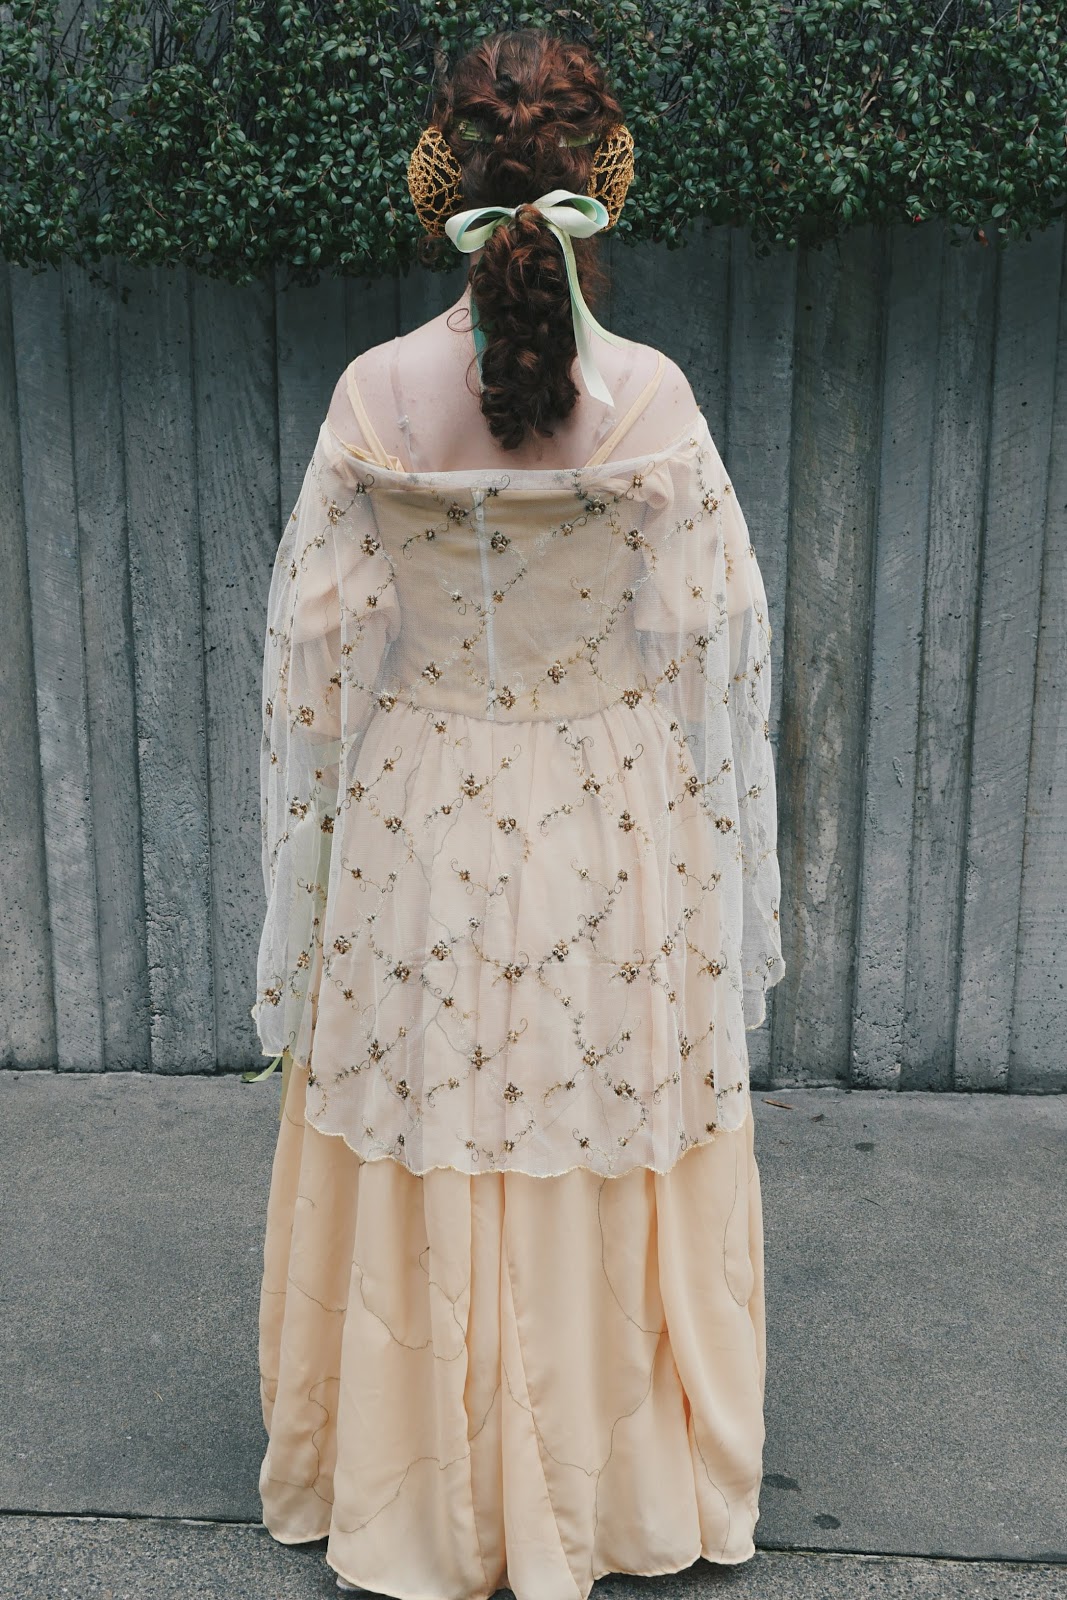
| Worn at Emerald City Comic Con 2018 |
I want to start this post out with talking about the fabric. The fabric for this costume was really important, especially for the cape. Because even if I wanted to, I don't have the tools or knowledge to embroider that pretty floral design onto mesh fabric (yikes!).
I got lucky, like really, really lucky, and found most of the fabric for this project second hand at Goodwill. The cape fabric is a curtain panel, and they had a 5 some-odd yard piece of yellow chiffon, as well as another curtain panel that was a crinkled yellow nylon (used in the bodice and petticoat).
When I found the fabric I snatched them up and that's when I started planning to make this costume. I think I paid around $15 for all that. The only other fabric I had left to buy was canvas to use as a base for the bodice.
 |
| The fabrics |
The pattern was self drafted and draped on my dress form. Below is what the bodice pattern looked like.
There were a total of 3 layers for the bodice; the base layer (canvas), the fashion fabric (crinkled nylon), and the lining (muslin). Once my base layer and fashion fabric were cut I surged them together, flat lining them.
Before stitching anything together I started working on the embroidery of the center front panel.
 |
| The layers, pinned and ready to be surged. |
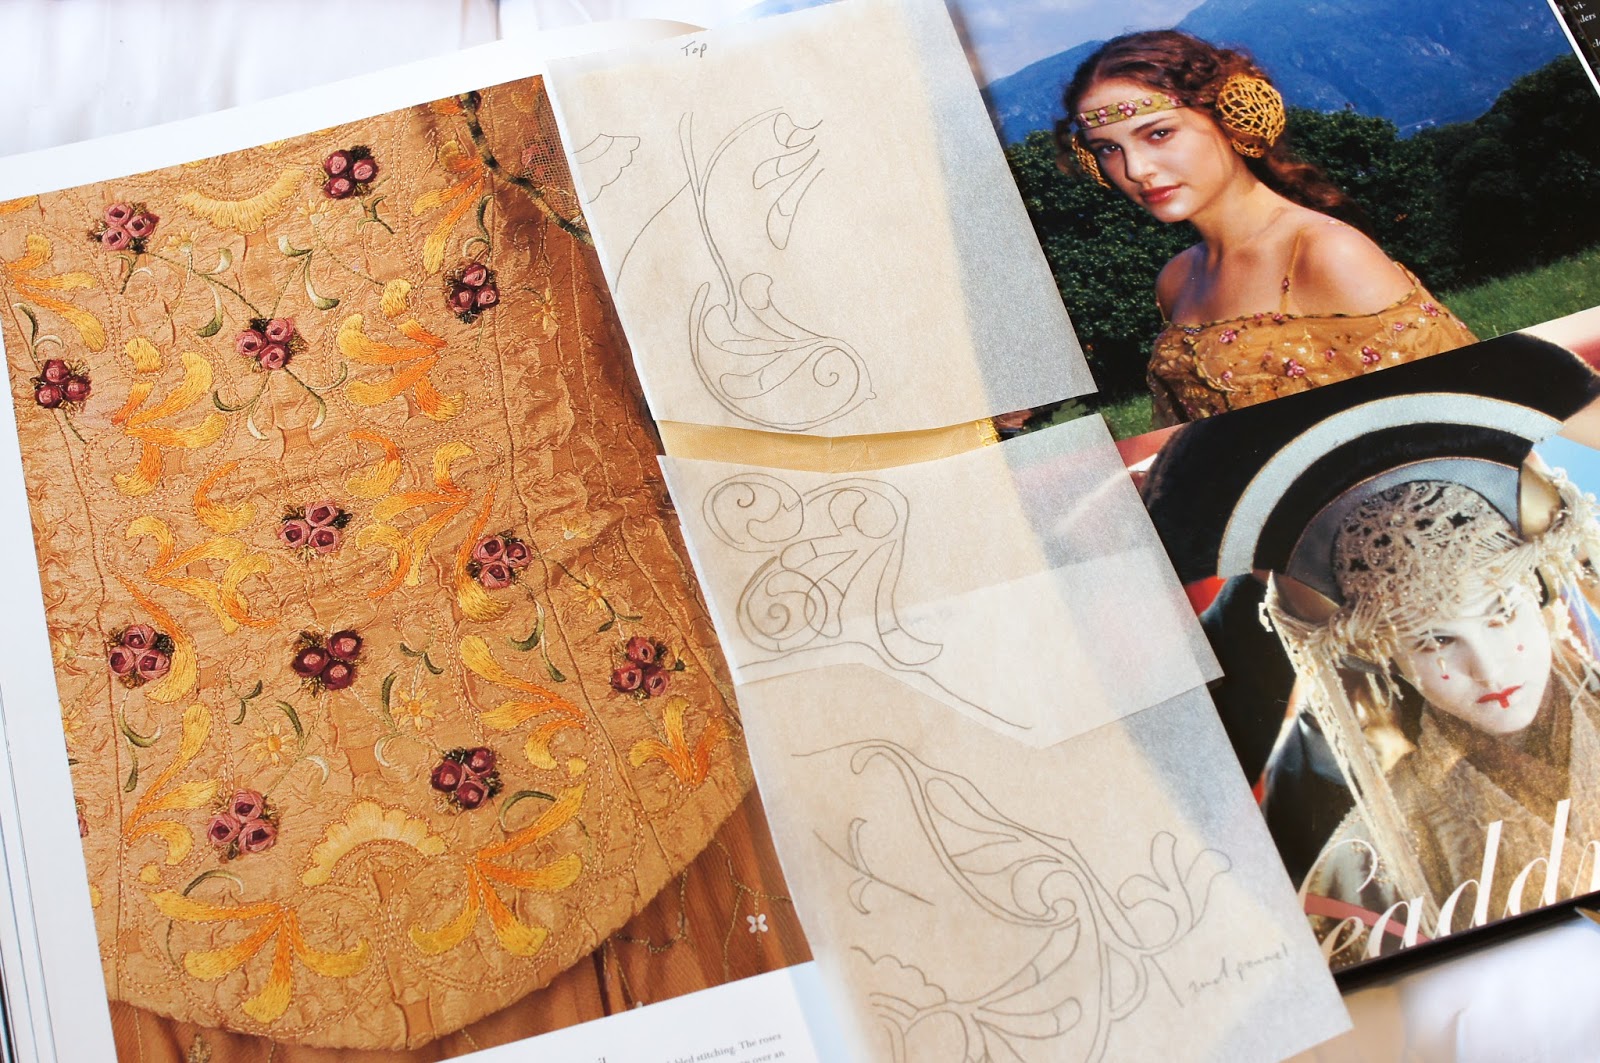
Because I'm not a great artist, especially when it comes to abstract designs, I traced the embroidery pattern from a close up shot in Dressing a Galaxy. The overall proportions were pretty accurate, except for the space between them, so I divided the pattern into three sections and pinned them each onto my bodice separately to get the positioning right.
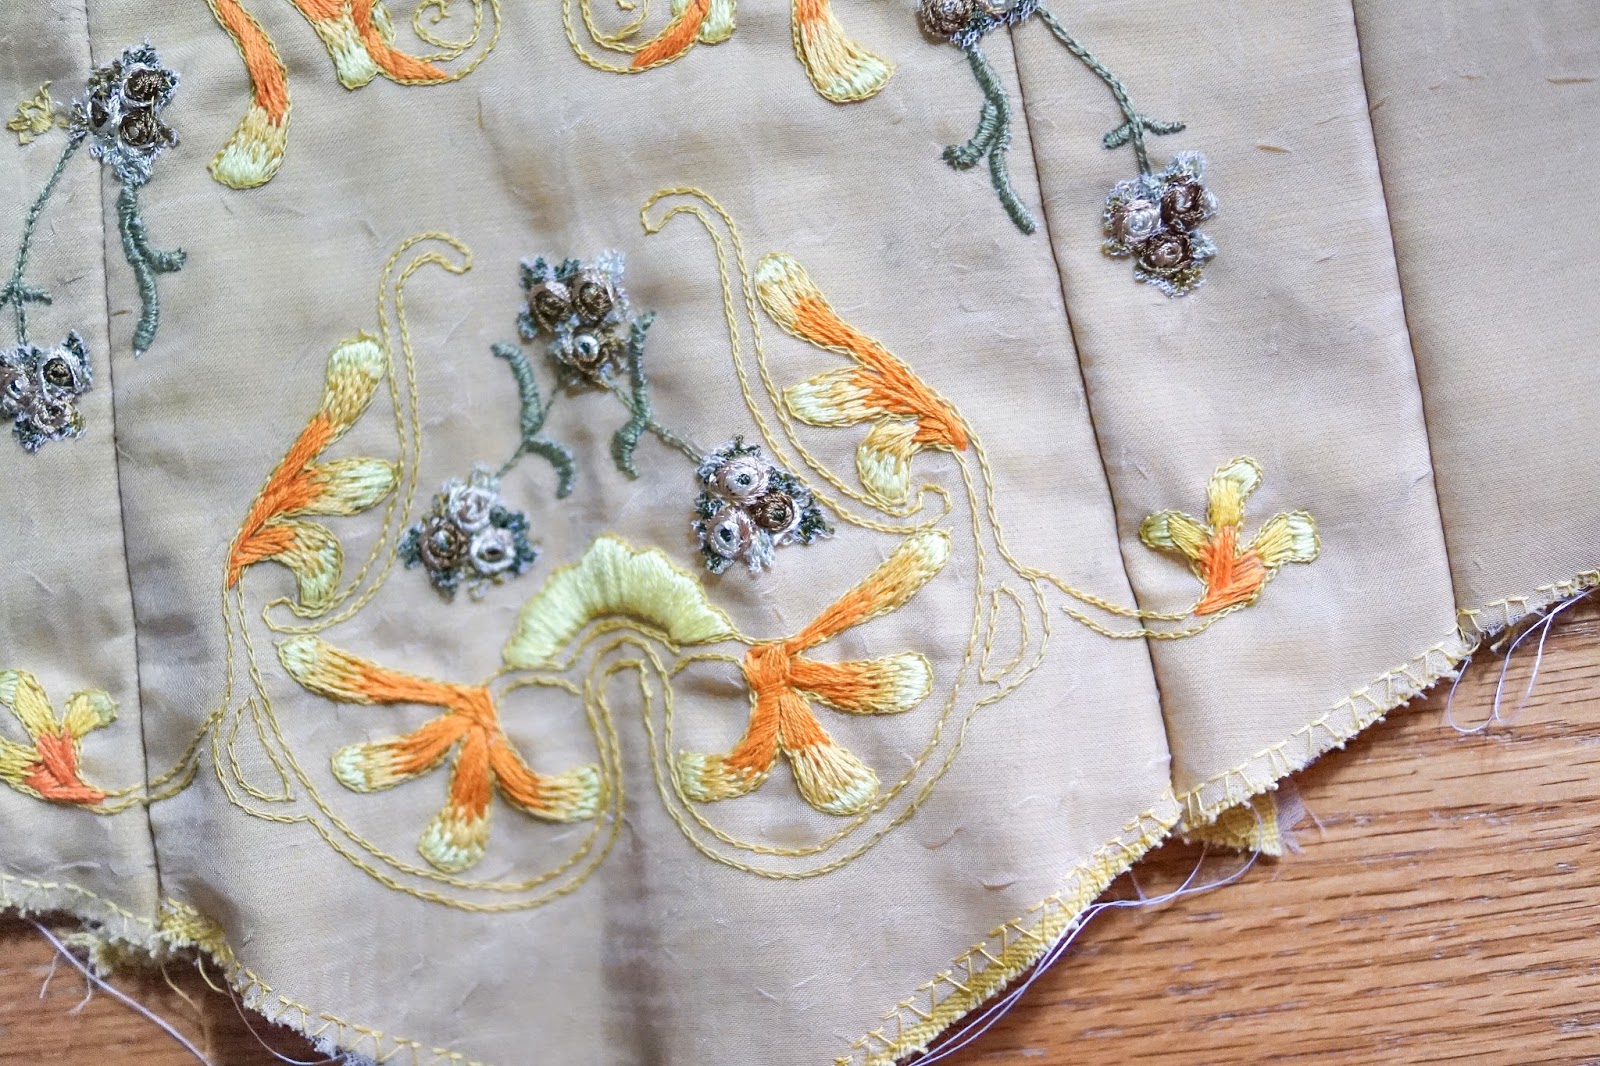
I started the embroidery by outlining everything in a chain stitch using normal thread that matched my fabric. This part wasn't supposed to be obvious, and mostly add texture and an outline to work within.
When I was done with each section I tore away the tracing paper. I also did some of the green embroidery of the leaves at this point too.
Once the whole outline was completed I filled in the places that needed it with various shades of yellows and oranges, and eventually expanded to the sides (I guess it's worth noting that somwhere in between here I stitched the rest of the bodice together).
I would recommend looking up tutorials on how to do this part instead of trying to wing it, like I did, because I didn't do a great job. I don't have much embroidery experience, so I was pretty much making it up as I went.
Once the embroidery was finished (a year later XD ) I added the embroidered flowers. Because I didn't know how to make/didn't want to make these, what I did was cut them off of scraps from the cape fabric and stitched them on.
They were a pain, but not nearly as much as they would have been if I had had to sew them completely by hand.
At this point pretty much all that was left for the bodice was to add boning and line it. I boned each seam except for the ones under the arms, and in the lining added three bones straight up the center to give a little extra support to the silhouette. I'm really glad I added those extra bones, they made a big difference.
The bodice closes in the back with a separating zipper. I would have preferred an invisible zipper, but I was afraid that the thickness of the canvas would have been too much.
The skirt and chemise were less intense to make, but still challenging. I hardly took any photo's of the process of making them, so I'll do the best I can to explain.
I decided to make the "chemise"/blouse a separate piece from the skirt because I didn't want it to be pulled down by the weight, as well as conserve fabric. Plus in a BTS video you can see that it's seperate and hand stitched to the lining of the bodice.
The blouse is a pretty simple design; it has a wide off the shoulder neckline with extra long sleeves, which have fitted cuffs and spaghetti straps. That's really about it.
The skirt was also fairly simple too, it's made of several "A" line panels and is gathered into a waist band and closes in the back with an invisible zipper. I put the gathers to sides and left left the front mostly flat. The shape of the original skirt is interesting and I'm still not sure what shape it was, probably a circle skirt of some kind, so I did my best to imitate it by choosing where to place the gathering.
I made two layers for the skirt, one in chiffon, and one of the crinkled nylon to add a little bit of volume and thickness. To finish off the edges I surged both layers separately and then folded the edges of the chiffon layer under once and used a narrow hem. I left the other layer alone since it was shorter than the other and wouldn't be seen.
This wasn't my original plan, but I ended up using an extra cotton petticoat underneath. I used a light 19th century petticoat I made several years ago to add just a little bit of volume to the skirt and I'm happy with the end look.
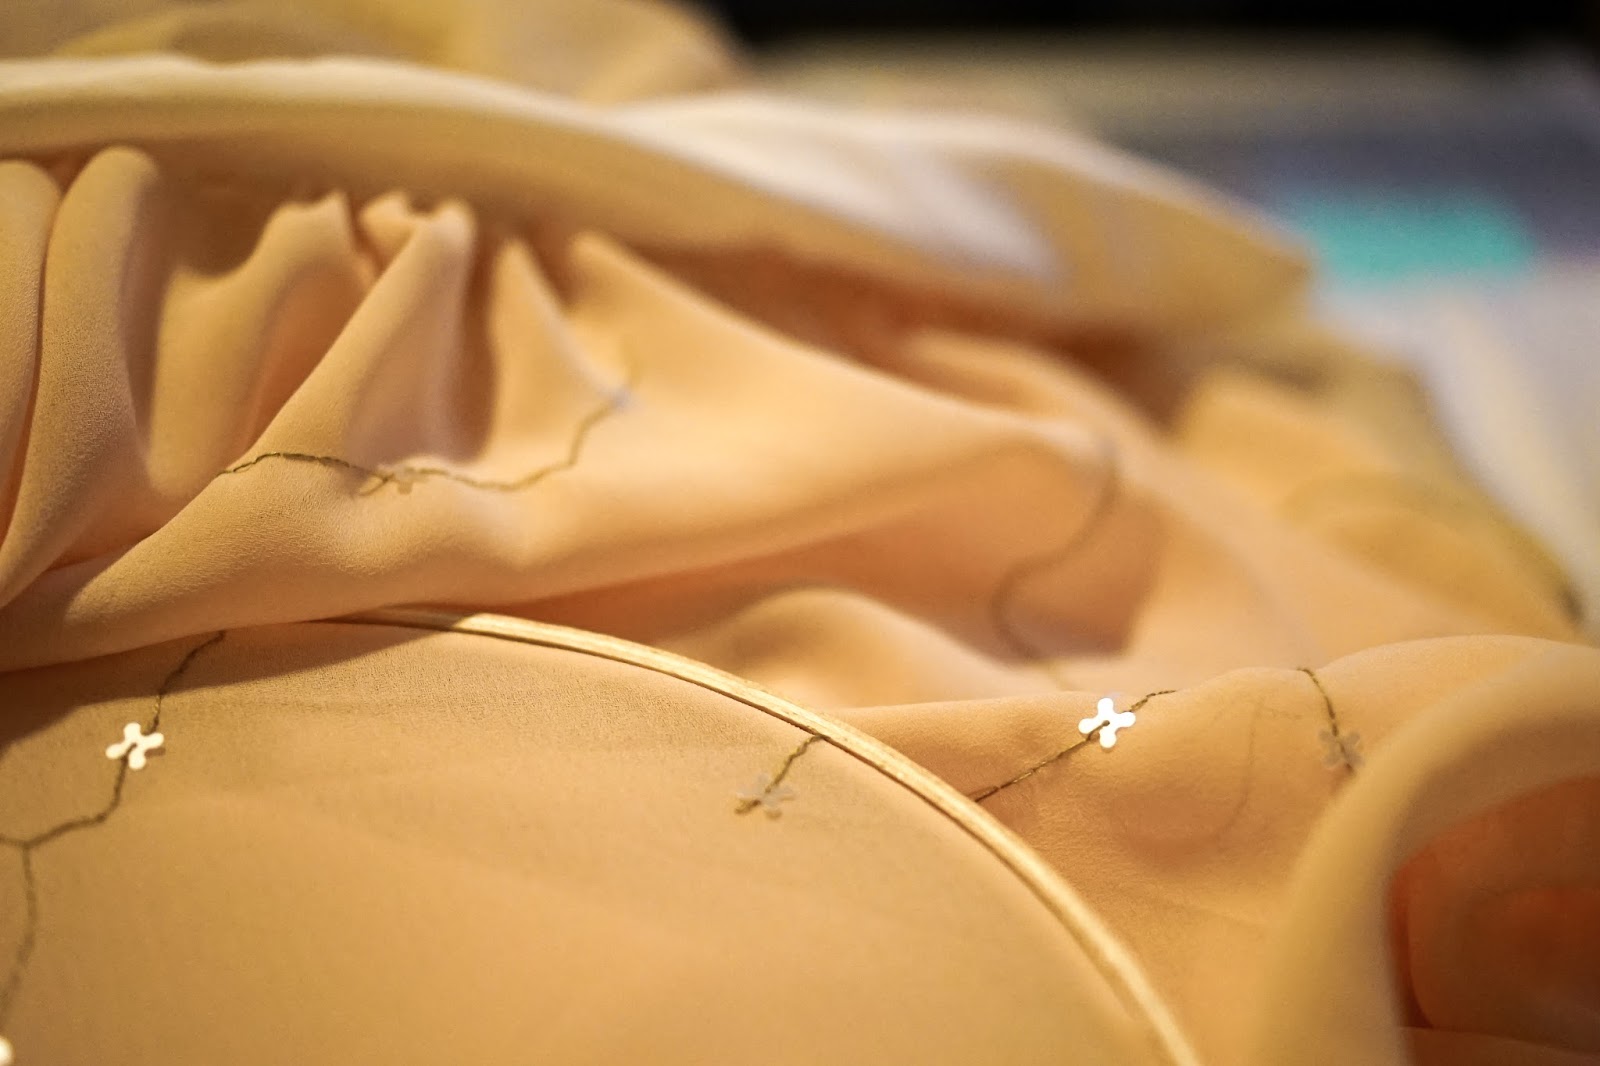
The embroidery on the skirt is really simple. It was straight stitches with sequins sewn on every few inches. At first I attempted doing a chain stitch, but it was too bold so I went down to plain straight stitches and it looked much more subtle, which is what I wanted.
The sequins are four petal sequins and are identical to those used on the original costume. It took me a while of searching online to find them, but I was finally able to find a vendor on ebay. Unfortunately I don't have their information any longer so I can't leave a link.
Lastly, the accessories. The shoes I wore were these silver flats, which I found on Amazon. They look nice, but they weren't very comfortable for walking around for several hours.
I also made the head piece, headband and ear muffs included, which I will be writing about in a separate post with a full tutorial soon.
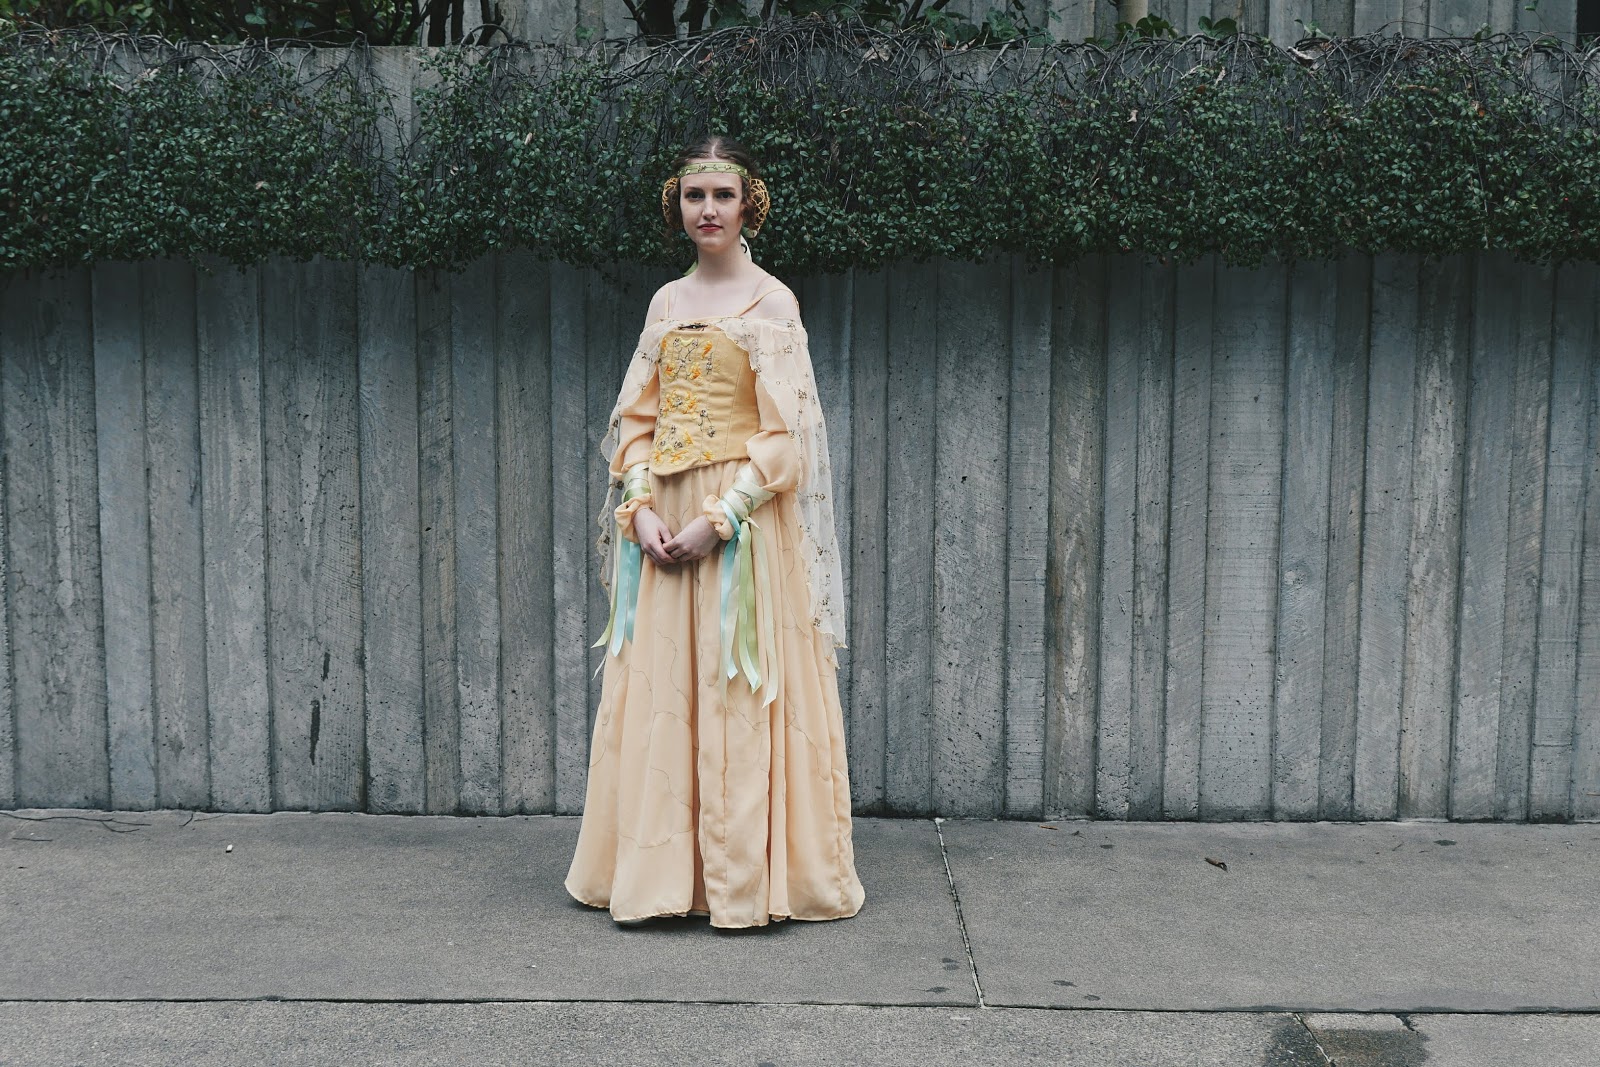
And that's all for todays post. Like I said, you should be seeing a tutorial on how to make the head piece soon. But for now, here's some more photo's of the finished costume at Comic Con.