Showing posts with label Mock Up. Show all posts

May 6, 2016

Costuming on a Budget

Money has always been tight for me and it's a well known fact that costuming (or any type of sewing for that matter) isn't cheap. Over my years of sewing I've figured out how to make costumes while still being able to afford it. So here are my tips for costuming on a budget.


1). The #1 rule of sewing any type of clothing - make a mock up. Not only will you refine the pattern you're making so it will fit and look just right, if you make a mistake it's on a piece of cheap material and not the material you paid $12 a yard for.

2). Take advantage of thrift stores. I regularly keep any eye out for costuming supply's at thrift stores like Goodwill. I've bought sheets to use for mock ups for cheap, found curtains that end up being perfect for accessories, and not to mention the shoes! I always check the thrift stores when I'm looking for shoes, because you never know what you might find and they're usually a great price.

3). Coupons. This one is probably obvious, but never go to a craft store without a coupon! Craft stores like Jo-Ann's are expensive and I once read an article that said never to buy fabric unless it's at least 30% off, otherwise you're getting ripped off. And it's true. Don't pay $12 a yard for cotton. Please.

The trick with coupons at craft stores is when they give you a good one the entire store is on sale for 20% off. There's not much you can do in that situation, but some stores like Hobby Lobby will take the sale price off and use your coupon instead. I've also heard that Jo-Ann's will price match, but I've never tried it.

4). Pattern sales. Never pay full price for a commercial pattern! Stores like Jo-Ann's put their patterns on sale all the time and it's normal for Simplicity Patterns to be $1 a piece and other brands between $2-5 a piece.

5). Do your research. Lets say you're making a corset, which in case you don't know anything about corsets they have to be made out of a material that doesn't stretch. There's a particular fabric called coutil made specifically for corsets, but it costs around $50 a yard. You probably don't want to pay that much unless you're an expert corset maker.

When I made my first corset I did some research and found that a lot of historical costumers use duck canvas instead. It costs around $10 a yard at Jo-Ann's, so with a coupon that's around $5. Much better than $50 plus shipping!

There isn't always going to be a cheaper option and someone who is more skilled at corset making would probably want to use coutil. But for my first corset? No way!


While there's lot's of good ways to save one money, I've found that sometimes cheap isn't always the best way to go. Here's a few things I've learned over the years that it's just best to spend the extra money on.

1). Patterns. They're expensive and sometimes a pain to work with, so pretty much since I started sewing I've avoided patterns whenever possible. I would opt to draft my own (which is great and I wouldn't change that even if I could go back in time) instead of spending $15 on a pattern. For certain things this really isn't a bad thing to do because sometimes there just isn't a pattern for what you want to make.

But I've had plenty of times when I knew there was a pattern that would work perfectly but I would try and draft it myself just to save the $20, and no matter how hard I tried I just couldn't get it to fit right and would end up spending unnecessary time and fabric to try and make it work.

Sometimes it's just worth it to pay up and get the pattern.

2). Muslin. As I stated before, I've purchased old sheets to use for mock ups. As I've become more experienced at sewing, the more I liked working with muslin. I usually buy a bolt of 20 yards every couple of months when it goes on sale for $.99 a yard, and to me it's worth the money.


And that's all I've got for now! I'll probably end up thinking of more things I wished I'd added, in which case I'll write another post about.

Do YOU have any advise for costuming on a budget?

Nov 3, 2014

Bustle and Petticoat Mock Ups

A few days ago I went to work on figuring out how I wanted to do my bustle for the Wishing Dress. Becuase I'm cheap, I started out by trying a pattern from Jean Hunnisett's Period Costume for the Stage and Screen. I copied out one of her bustle petticoat patterns and put it over top of a basic pillow bustle I made a while back.

This was the end result.

I also took another pattern from the book for the mock up of the skirt. I didn't gather it in the back like it was supposed to be since I didn't know weather I would end up using that skirt pattern or the bustle underneath. So it's just kind of pinned in the back.


After much consideration I've decided to make a bigger bustle, and one with wire in the back. This was partially to get the bigger bustle but also becuase I'm afraid that after I put the weight of the skirt and the waterfall bustle it will kind of crush what silhouette I have. Having a bustle with wire will give both a bigger shape and also give it more support.

The pattern I ended up going with is the Truly Victorian 101  Wire Bustle. I also purchased the wire for the bustle from Truly Victorian, which is really convenient because it'll come already cut and to the proper size. I won't have to worry about finding wire, then cutting it, and then finishing the tips. Plus it's pretty cheap. Which is always a great thing, especially since I think I'll end up spending a lot on this costume.

Petticoat with Wire Bustle - Revised

I can't wait to get the fabric and for the pattern to get here so I can make it!

Aug 10, 2014

Rose Tyler Mock Up

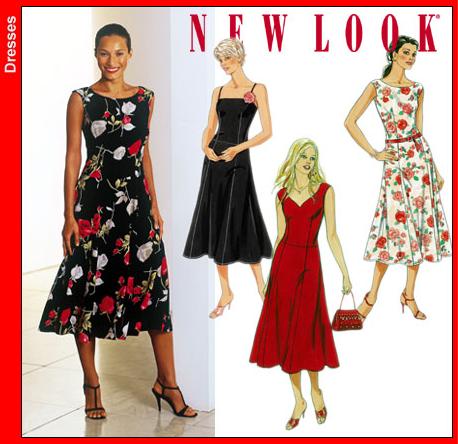
Okay, so I started out with using New Look pattern 6156 for the bodice mock up for my Rose Tyler costume. I started out doing it exactly as the pattern went just to see how it would look. I already knew I would have to make some changes so I could add boning, because the bodice is obviously boned. This pattern only had darts in both the front and back.


This is what the top looked like when I did it the way the pattern is. As you can probably tell, it didn't fit at all the way it should have.


I un-stiched the darts and added Princess type seams to both the front and back.

On the right is the original pattern and the left is my alteration. It fit so much better after this!

I tweaked the back a little bit before cutting out a second layer for the lining. I ended up having to take it in a little bit in the front seams and cut the back panels a little smaller before I was satisfied with the fit.

As you probably noticed I added straps to my bodice. The actual dress is strapless, but I'm not comfortable with that and because it won't be seen anyways, I decided to add straps.

I started testing pleats on a piece of scrap material to figure out how to do the pleats. I think they're supposed to be one way pleats, but I couldn't get that to work. I decided to go with box pleats. After doing some excruciating math with the help of my mom, I finally figured out how wide I needed to make  the waist of my skirt.

Because I didn't want to use a ton of material for the mock up of the huge circle skirt, I just cut out a quarter of it. You can't tell from the picture, but it's a few inches short.

I just have to make a few adjustments to my pattern before I can go fabric shopping! YAY! So far this costume has been a lot easier and quicker than I thought it would be *happy dance*

Apr 8, 2014

Obi Wan {Revenge of the Sith}

May the Fourth is just around the corner and if you're a Star Wars geek and costumer like me, then you know what that means. It's time to make a new Star Wars costume!

I've been wanting to make my own Jedi ensemble for a while now, so that's what I decided on making for this year. I posted a while ago about Jedi inspiration and making my own unique costume, but I've decided do it a little different.

I love Obi Wan in the prequels, so I'm basing my outfit on Obi Wan's from Revenge of the Sith (my favorite of his three uniforms/outfits/whatever you want to call it). I wanted to share some of my research even though I've already got the mock up done. I'll be buying the material next week and I think I'll have the sewing part done not too long after that.

Most Jedi costumes are fairly simple, consisting of the outer tunic, tabards, the obi, whatever undershirt they have, pants, boots and belt. I'm gonna start from the top and work my way down.

Around his neck is his undershirt, which has three pleats and is made from a dark brown knitted material. His inner sleeves are made out of the same material and are scrunched near the wrists.

Next we have the outer tunic (OT) which crosses in the front and has long, wide sleeves. It's made out of a sort of gauze in a tan/brown color. The sleeves of the OT are lined, but the rest of it isn't.

The tabards are the wide strips that come over his shoulders and hang down a few inches below the OT on both the front and the back. They are held in place by the obi, which is the sash like thing around the torso under the belt. Both the Tabards and the obi are made out of the same material as the OT.

Jedi belts are made up of two belts. The first one is about 2 inches wide and the second one is about 1/2 inch wide. The smaller belt is held in place by 8 sam browne rivets placed around the belt. It also has a fancy clip in the center front.

Around the belt are many things such as pouches, food capsules, and of course their lightsaber.


Here in this picture you can see my favorite part of every Jedi costume, the boots.


For drafting my OT pattern I used Ver's pattern as a guideline, and I was able to get the mock up done really quickly.


I'm planning on buying the pants and part of the undershirt (I'll explain more in a later post). I'm also going to be making the belt myself, but I'll be posting about that more later too.


Feb 3, 2014

Vest and Skirt Update

 I've made some really good progress on the Packing Gown! YAY! I actually finished (for now at least) the skirt and under skirt mock ups. Here's some pictures of the skirt (with the underskirt on of course).


 I think I'm going to need to add another row or two of ruffles to the under skirt, but for the most part it's looking pretty good.

After struggling a lot with the vest, I finally got it right! The back is done except it does need a little work on the shaping of the bottom. Unfortunately this  used up the last of my mock up material. Hopefully I'll be able to get more quickly.


I've almost completed drafting the front as well, but it still needs a bit of work. I've also been working on the collar but obviously I haven't been able to sew it on just yet.

I think that's it for now. Hopefully I'll be getting more material soon so I can keep going.

Dec 20, 2013

Packing Gown Mock up Progress

I made some major progress on my mock up for Padme's Packing Gown this week. I'm so excited to see it all coming together! I made the under vest mock up this last weekend and then I also have made some huge progress on the under skirt and and skirt mock up.

Here's some pictures of the under vest. I haven't gotten to the sleeves yet, as you can tell. It has three pieces of boning in the front and then there are a total of four pieces on the back. There isn't a lot of information of what goes under the costume, so I was left to come up with a lot by myself.

When I was looking at others costumes, I saw someone did a lace up back for the under vest. I decided that that would be the best way to do this, so I did. This was my first time using grommets and it went well. They're pretty easy to use. For the mock up I only used twelve (six on each side) but when I made the real one I want to put a few more on each side. I still don't know for sure how may I will do.


Right now the skirt is in two half's and is only pinned onto Mannie (my sewing form). It's harder to see in these pictures, but the skirt is very, very full. It's definitely screen accurate in fullness. I still need to work on the back though.

I also completely re-did the under skirt. I have four rows of ruffles which are about 6.5 inches wide. I have three rows of ruffles and on the bottom row there are two layers of ruffles.

I've started working on the bustle pad. I'm going for something like this one here, only not as big. The bustle on Padme's dress is very small.
The Little Seamstress

Nov 22, 2013

Packing Gown Skirt Mock Up

I've been working on the skirt mock up for the packing gown for the last week or so now, and I've started to make some really good progress. I've been trying to figure out how to work the pleats and have gone through a lot of different types and trials.

This was my second attempt at getting the pleats right.

As you can see here it looks pretty good on the top, but the bottom half of the skirt isn't as full as it needs to be. So I took all of those pleats out and tried again but this time made them smaller.

This is what I have for the underskirt right now. The plan is to put ruffles along the whole under skirt, but for right now this is all I have and it's working for the time being.

Since my room is so small I have to spread everything out on my bed. Here's some of the reference photo's I've been using.

I recently bought "Dressing a Galaxy" by Trisha Biggar, and it's an amazing book! Unfortunately it only has two pictures of the packing gown in it. But I've still found it really helpful in making this costume so far.

For my next attempt at the skirt I needed more material so I found some old sheets and have been using that. I made the pleats smaller and that did help, but it still wasn't looking quite right. I needed the pleats to be even smaller, but I didn't know how to do that. I went and looked through my reference photo's to try and get an idea of what to try next.


I decided to test out an idea I had after I noticed in this picture that the skirt seemed to be sewn to the under bodice. It doesn't look like it's pleated at this part but instead just gathered and the waistband underneath seems to have the pleats pinned into place.

So I went back to my previous fabric to test it out and it worked! I gathered it and pinned it onto the sewing form before adding the waistband.


I guess you could call it a mock, mock waistband. It didn't look the nicest but it seemed to be working.

 I went back to the sheets and gathered it. The sheet's were approximately 2.5 yards long and that just barely made it around. So I think I'm going to have to add another yard to yard and a half because the back isn't as full as it should be.

Please excuse the mess. Like I said before, my room is small and everything goes onto my bed or floor when I'm sewing.

So that's pretty much where I'm at right now. I attempted to get the little bustle the skirt has by creating a bustle pad, but it ended up being too big and more like and 1870's skirt than Padme's packing gown. So I'm going to be trying some other methods next.